Welcome to THE ALMOST FAMOUS MOM page !
You only need a few ingredients for this easy Keto Cheesy Tuna Pie with Hazelnut flour crust. It will be your favorite low carb pie! 
 
In this recipe I used canned tuna in olive oil and added some mayonnaise, cream cheese and crushed black pepper to make the filling more flavorful. This step is a freestyle recipe as there is no one rule on how you wish to season your canned tuna - or you can simply use it from the can without any hassle of seasoning it with something fancy.
Keto Cheesy Tuna Pie
(makes 2 ramekin-size servings)

For the crust:
30gm Butter (melted)
6 tbsp Hazelnut Flour
1 tbsp Coconut Flour
Pinch of Salt
Italian Herbs (optional)

For the filling:
1 can Tuna in EVO Oil (I only used 3/4)
2 tbsp Mayonnaise
2 tbsp Cream Cheese (I used Arla Herbs & Spices cream cheese)
4 florets Broccoli
Black Pepper

Topping:
Mozzarella Cheese

Directions:

  1. Preheat the Airfryer at 160°C.
  2. Whisk together all the dry ingredients. Stir in melted butter until the dough comes together and resembles coarse crumbs.
  3. Prepare the ramekins by oiling it then fill the ramekins with the dough and press firmly into the ramekins (it is quite difficulty with small size ramekins). Prick all over with a fork before baking.
  4. Place the crust in the Airfryer and let it bake until the edges are golden brown, about 12-15 minutes (baking time might varies depending on your ramekins size).
  5. To prepare the filling, combine all the ingredients together (except broccoli) and mix it well. Scoop the filling into the crust and top it with few broccoli and lots of Mozzarella cheese.
     
     
  6. Adjust the Airfryer temperature to 180°C. 
  7. Place the ramekins into the Airfryer and let it bake until the top turn golden brown, about 10-12 minutes. 
  8. You can use the crust recipe for sweet pie by adding some sweetener such as stevia powder.
March is the month when the whole world celebrates in honor of the Womankind. It also celebrates the achievements of women throughout history. And yes, that includes me and you (if you are a woman)! Happy International Women's Day!

What better way to celebrate today with this easy-peasy and yummylicious AirFried Tom Yum Chicken Wings. Happy International Women's Day!
These Thai-inspired AirFried Tom Yum Chicken Wings are so incredible and full of flavors. I believe this dish will soon become one of your dinner favorite.
Why?...because it is just so easy to prepare and will surely makes those tummies happier!

All you need are fresh chicken wings (or any parts of the chicken...prefrebably with the skin still on) and some pre-made Tom Yum paste (or you can homemade one!). And cooked the fuss-free way with the Philips Airfryer.
It's "EASY & FANTASTIC".

I would like to thank Amy Chai for sharing this quick & easy and yummy recipe! As always you are one my most consulted sifu :)
AirFried Tom Yum Chicken Wings

8 Chicken Wings
2 tbsp Tom Yum Paste
1 tbsp Water

Flour Coating:
2 tbsp Cornflour/Corn Starch
2 tbsp Potato Starch (or Tapioca Starch)
1/2 tsp Baking Powder

Directions:
  • In a bowl, mix together the Tom Yum paste with water. 
  • Pour the Tom Yum mixture into the chicken wings and let it marinate for at least 4 hours (prefrebably overnight).
     
  • Preheat the Airfryer at 180°C.
  • Combine the cornflour, potato starch and baking powder, and mix well. Coat the chicken with the flour mixture, shaking off any excess. (Tips: I've added some of the marinade juice in the flour mixture to make it more gooey so the chicken wings will not have the powdery-hard crust)
     
  • Spray a little oil on the chicken wings and place it on the grill pan.
  • AirFry for 10-12 minutes. At the end of time, flip over and continue to AirFry for additional 5-8 minutes.
  • Transfer to a serving plate and top with some chopped coriander and lime wedges.
     
Adapted from Amy Chai
Nothing beats a hearty, gooey and crunchy AirGrilled Cheese Sandwich. All you need is bread, butter and some cheese of your choice....voila....what a perfect comfort food!

With the Philips Airfryer it is so easy to have the perfect AirGrilled Cheese Sandwich that has a golden, crusty outside and oozy inside.
This is an awesome, easy and perfect recipe for me to prepare my lunch as my workload is pilling up and me working real hard to aim for a promotion this year.

Despite all the hardwork...everything can stop while I'm enjoying my piece of AirGrilled Cheese Sandwich!
AirGrilled Cheese Sandwich

2 slices Wholemeal Soft Bread
Shredded/Grated Cheese (I used Cheddar and Mozzarella)
Butter (salted)

Directions:
  • Preheat the Airfryer at 180°C.
  • Generously spread the cheese on one bread then cover it with the remaining slice.
  • Place the sandwich on the grill pan then add a cube of butter on top of the sandwich (helps with browning the sandwich). 
     
  • AirGrill for about 8-10 minutes or until golden brown.
     
As I'm getting up-to-speed in my new role at the workplace, my schedule is getting busier than ever....so cooking stew is definitely a must as it's a great full-course meal when serve with rice or bread. And the best part of all....you can keep the stew overnight and reheat whenever you want to eat it. Remember....all stew "ages" well!...LOL!
This is a hearty and semi-traditional Irish Lamb Stew that is super satisfying, filled with tender meat and vegetables, this is just the thing for a cold rainy night.
PS: you know it is not going to be 100% traditional as I'm not an Irish..haha!
Truly an epitome of comfort food!
Irish Lamb Stew

700gm Lamb Cubes 
2 medium Onion (chopped)
3 cloves Garlic (chopped)
2 tbsp Flour
1 can Guinness Stout (320ml)
1 cup Beef Stock
3/4 tsp Dried Rosemary
3/4 tsp Dried Thyme
1/2 tsp Ground Black Pepper
1 Bay Leaf
2 large Carrot (chopped)
4 small Potato (chopped)
Handful of Fresh Parsley (chopped, and a little more for garnish)
Salt

Directions:
  • Turn on the Philips Pressure Cooker and select Bake mode for Chicken.
  • Add a little oil in the inner pot and brown the lamb cubes.
  • Add chopped onions and saute until tender.
  • Then add chopped garlic then sprinkle the flour and stir well.
     
  • Pour in the Guinness Stout and beef stock. Then add rosemary, thyme, black pepper and bay leaf, and stir well.


  • Let it boil and simmer for about 10 minutes without the lid.
  • Add chopped carrots, potatoes and parsley. Add salt to taste if needed.
     
  • Switch the Philips Pressure Cooker to Beef /Mutton mode with KPT (Keeping Pressure Time) of 59 minutes. Secure the lid and position the valve to Seal. 
  • If the stew is too watery, switch to Bake mode with Chicken and let it simmer until it reaches the consistency you prefer. You may also add some flour (flour diluted with a little water) to thicken the stew. 
  • Garnish with some fresh parsley and serve with rice or bread.
     
      
Adapted from Kev Le Rat
November was indeed a very busy month for us because it was a month filled with many holidays, parties and travelling.
We drove up north to Betong, Thailand so we can experience some Thai during Diwali holidays,
 
 
It was an awesome trip with lots of Thai food and Thai shopping..LOL! Stay up to date on my "Live" status update on The Almost Famous Mom Facebook page.

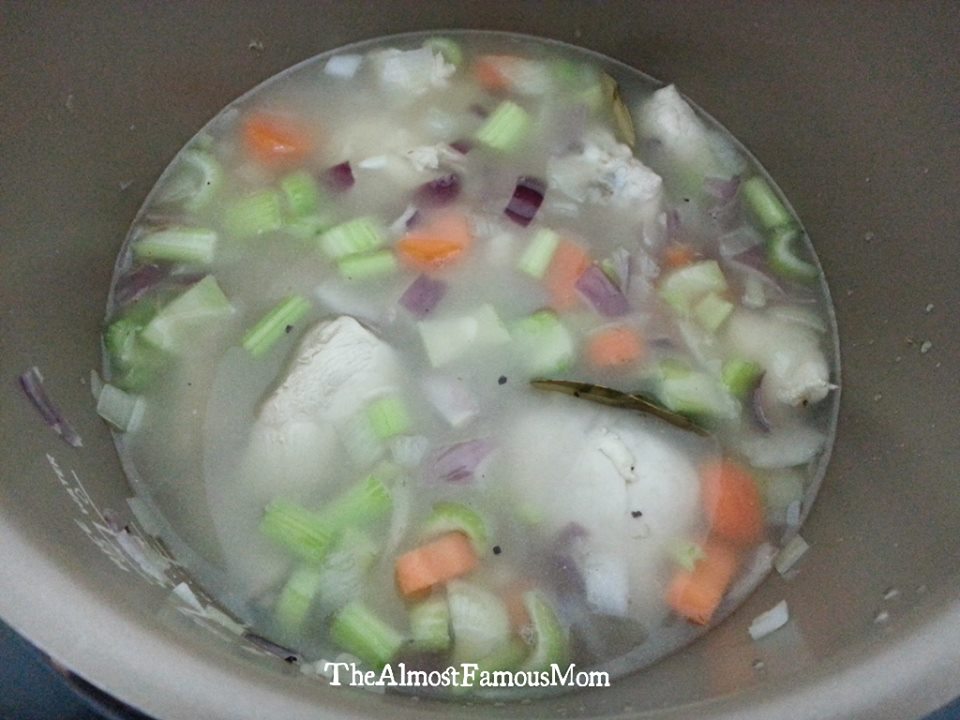
Now let me share with you one of the latest recipe....Copycat Tony Roma's Chicken Soup. Tony Roma's happen to be one my favorite restaurant because they served awesome food especially "the ribs"..yum! I fell in love with the TR's Chicken Soup and decided to re-create this clear chicken soup at home with the help of my super Philips Pressure Cooker.
Here in Malaysia, we are getting lots of rain and storm lately...so what can be better when you are at home on a rainy day enjoying a bowl of warm chicken soup? Let's not tempt you any further but to share this quick and easy recipe with you!
Copycat Tony Roma's Chicken Soup

500gm Chicken (de-skinned and blanched)
1 large Yellow Onion (peeled and chopped)
1 medium Red Onion (peeled and chopped)
1-2 medium Carrot (peeled and chopped)
2-3 stalks Celery (chopped)
3 cloves Garlic (peeled and chopped)
1 Bay Leaf
1/2 tsp Freshly Ground Black Pepper
3 1/2 cups Water
Salt 
A dash of Ground Cumin (optional)


Directions:
  • Prepare the ingredients and select Bake mode for Chicken on Philips Pressure Cooker . 
     
  • Place chicken, onions and garlic into the pot and let it cook until the chicken is lightly browned (about 3-5 minutes). 
  • Then add the remaining ingredients and stir well.
     
  • Close the lid securely and position the valve to Seal.
  • Reset the Philips Pressure Cooker to Soup mode with KPT (Keeping Pressure Time) of 30 minutes.